Employee-Generated Art Walls: Participation and Pride
An employee-generated art wall is a practical way to build connection at work. Invite people to contribute images or designs that represent the team, then display selected pieces as a coordinated wall feature. In a lobby, hallway, or conference area, this kind of wall does more than fill blank space—it makes people feel seen and reminds everyone that the work is done by real humans.
This guide walks through planning, collecting submissions, preparing files for printing, and keeping the display fresh without adding extra work. You’ll also see how to pair employee-made pieces with curated canvas art so the wall looks intentional and ready for a professional setting.
What Is an Employee-Generated Art Wall?
The Concept in Plain Terms
Instead of choosing artwork only from a catalog, you invite employees to submit original pieces such as:
- Drawings
- Photos
- Digital illustrations
- Typography posters
- Visual snapshots from team life
A small review group selects items that fit clear guidelines. These are then printed in consistent sizes and displayed as a gallery-style wall.
How It Differs From Standard Office Wall Decor
Standard office wall decor is often chosen by one person and stays the same for years. An employee-generated wall is built through participation and can rotate by:
- Quarter
- Department
- Project cycle
Done well, it becomes a living record of milestones—launches, wins, volunteering days, and the people behind the work.
Set Goals, Scope, and Clear Rules
Pick a Purpose Before You Ask for Submissions
Start with one clear goal and write it down. Examples include:
- Welcoming new hires
- Celebrating project completions
- Supporting company values
- Building pride in the workplace
A defined purpose keeps submissions focused and relevant.
Define Submission Guidelines and Review Flow
Keep rules short and easy to follow. Outline:
- Accepted formats
- Content restrictions
- Review process
A simple two-step review works well:
- Permissions and workplace fit
- Print readiness (resolution, cropping, final size)
Handle Permissions and Credit Lines
Use a simple consent form for work that includes recognizable people or brand marks. Offer flexible credit options:
- Full name
- First name only
- Team name
- Anonymous
This increases participation without pressure.
Create a Participation Plan That Works
Make Submitting Easy for Everyone
Lower barriers to increase participation:
- One upload form
- One clear deadline
- One sentence explaining the theme
Accept digital files and scans so remote employees can join easily.
Easy participation ideas:
- Prompt of the Month: One topic, one week to submit
- Team Sketch Break: 20 minutes during a meeting
- Photo Day: Images showing “how we work”
- Project Spotlight: One submission per project team
Choose Your Curation Method
Simple, fair options include:
- Rotating by department
- A small review panel with clear rules
- Team voting for one featured spot
Consistency and transparency matter more than the method itself.
Turn Submissions Into Print-Ready Wall Art
File Types That Print Cleanly
Best options include:
- High-resolution photos
- Scanned drawings
- PDF, PNG, or high-quality JPG files
Ask contributors to avoid heavy filters and tiny text.
Canvas Prints vs Art Prints
- Canvas prints: Ideal for anchor pieces and featured work
- Art prints: Suitable for smaller framed items
Choose one primary format so the wall feels cohesive.
Size and Layout Basics
Use a limited set of sizes for a clean look.
Popular layout styles:
- Grid wall: Same size, easy rotation
- Timeline row: Equal sizes with dates
- Feature + support: One large center piece
- Department columns: Each team updates on schedule
Place the Wall Where People Will See It
High-Traffic Locations
Best placement options include:
- Lobby
- Entry corridor
- Main hallway
- Outside conference rooms
Avoid hidden or low-traffic areas.
Remote-Friendly Visibility
For hybrid teams:
- Share monthly wall photos internally
- Mail a small canvas piece to remote employees
- Feature their home-office display on the main wall
Plan the Design and Installation
Create a Simple Visual System
- Keep spacing consistent (2–3 inches)
- Use matching labels with:
- Title
- Contributor credit
- Date or project tag
Mounting and Safety
- Use proper hardware for wall type
- Keep center line at eye level
- Avoid protruding frames in busy areas
Lighting Tips
- Avoid harsh overhead lighting
- Use soft, angled lights if possible
- Test visibility at different times of day
Keep It Fresh With a Rotation Plan
Choose a Realistic Schedule
- Quarterly rotation works for most teams
- Rotate by project cycle if applicable
- Keep one small monthly feature area
Archive Past Sets
Store files with clear naming:
This makes reprints and moves easy.
Measure Results Without Overcomplicating
Track Participation and Sentiment
Measure:
- Number of submissions
- Repeat contributors
- Department representation
Ask two quick questions:
- “Did you notice the wall this month?”
- “Does it make you feel more connected?”
Share Wins Internally
Post a short recap each cycle:
- Theme
- Submission count
- Featured pieces
Visibility fuels future participation.
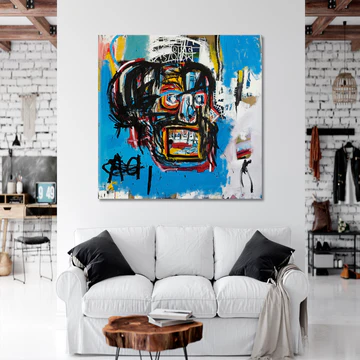
Pair Employee Walls With Curated Wall Art
Employee pieces shine when paired with strong anchors. Many teams place a large central canvas and rotate employee art around it.
Start with office wall art prints that match your space, then add employee contributions for storytelling.
For leadership or project-focused walls, mix in business-themed canvas prints.
Artesty canvas prints are made on natural canvas with high-quality ink and hand-stretched on 1.5-inch (3 cm) wood panels. Learn more in how Artesty creates canvas prints.
Quick Start Checklist
- Pick one high-traffic wall
- Define one theme and deadline
- Create a submission form with consent
- Share file quality guidelines
- Collect and review submissions
- Select print sizes and layout
- Prepare final print files
- Print and label each piece
- Install safely at consistent height
- Announce and set next rotation date
Frequently Asked Questions (FAQ)
1) Who owns the employee-submitted artwork?
Employees retain ownership. The company receives permission to display the work as outlined in the consent form.
2) Can contributors remain anonymous?
Yes. Offer anonymous or team-name credits.
3) What file size is best for printing?
Always request the highest-resolution original file.
4) Can company event photos be used?
Yes, with consent from everyone shown.
5) How many pieces should we start with?
Start with 9–15 pieces.
6) One theme or multiple?
One theme per rotation works best.
7) What if content doesn’t meet standards?
Use published guidelines and invite resubmission.
8) How often should we rotate?
Quarterly is ideal.
9) Best hanging height?
Eye level for the center line.
10) How do we label without clutter?
Use small, consistent labels with 1–2 lines.
11) What if a piece is damaged?
Reprint from the archived file.
12) Can we include customer stories?
Yes, with permission and relevance.
13) How do we include remote employees?
Accept digital submissions and feature them every cycle.
14) Grid or free-form layout?
Grids are easier to maintain.
15) Where should we start?
One wall, one theme, one date.