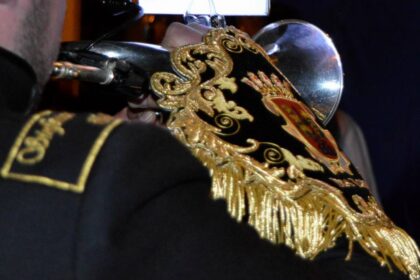
Embroidery is a beautiful and durable way to bring designs to life on fabric — whether it’s a business logo, a name, or a creative artwork. But before any design can be stitched by a machine, it needs to be digitized. Digitizing is what transforms a simple image into a precise set of instructions that tells the embroidery machine exactly how to sew the design.
Understanding this process is essential for anyone involved in embroidery — from beginners and small shop owners to professional decorators and apparel manufacturers. In this guide, we’ll answer the most frequently asked questions about digitizing and explain everything you need to know to get clean, consistent, and professional embroidery results every time.
What Is Digitizing for Embroidery?
Digitizing is the process of converting a design or logo into a stitch file that an embroidery machine can read. This file contains detailed instructions on how the design will be stitched — including stitch direction, density, underlay, and color sequence.
Unlike printing, where images are simply transferred to a surface, embroidery requires thousands of individual stitches placed at precise points. The digitizer uses specialized software to create this roadmap, ensuring that the design stitches smoothly and looks exactly as intended.
Why Is Digitizing So Important?
Digitizing determines the final appearance and quality of embroidery. A poorly digitized file can cause uneven stitching, thread breaks, or distorted designs. Proper digitizing ensures:
-
Clean edges and smooth fills
-
Accurate color changes
-
Consistent results on different fabrics
-
Faster machine runs with fewer thread issues
For embroidery businesses, great digitizing means fewer production problems, less waste, and happier customers.
How Does the Digitizing Process Work?
The digitizing process involves several important steps:
-
Artwork Preparation: The image or logo is reviewed and cleaned. Vector artwork (like AI or EPS) is preferred because it scales without losing quality.
-
Size and Fabric Selection: The digitizer determines the design’s final size and adjusts stitch settings to match the type of fabric being used.
-
Choosing Stitch Types: Running, satin, and fill stitches are selected for different design areas.
-
Underlay and Density Setup: A stabilizing base layer is added beneath the main stitches, and stitch density is fine-tuned to balance coverage and fabric stress.
-
Pathing and Sequencing: The digitizer organizes the stitching order to minimize jumps and trims for a smooth production run.
-
Saving in Machine Format: The file is exported in the correct format (DST, PES, EXP, or others).
-
Test Stitch-Out: A sample is embroidered to check for errors before full production.
Each step requires technical skill, attention to detail, and an understanding of how threads and fabrics interact.
What Are the Common Stitch Types Used in Digitizing?
A design is made up of different stitch types, each serving a specific purpose:
-
Running Stitch: Used for outlines and fine details.
-
Satin Stitch: Ideal for lettering, borders, and small filled shapes.
-
Fill Stitch (Tatami): Used to cover large areas with even texture.
-
Underlay Stitch: The foundation that prevents distortion and adds stability.
The choice of stitch type depends on the artwork style, fabric type, and overall design size.
What File Formats Do Embroidery Machines Use?
Embroidery machines read specific file formats that store stitch data. The most common formats include:
| File Format | Machine Type | Description |
|---|---|---|
| DST | Tajima | Most widely used commercial format |
| PES | Brother, BabyLock | Popular for home and small shops |
| EXP | Melco, Bernina | Common in commercial embroidery |
| JEF | Janome | Used for domestic embroidery machines |
| VP3 | Pfaff, Husqvarna | Common among advanced home machines |
Choosing the correct format ensures compatibility and prevents errors during stitching.
How Much Does Digitizing Cost?
Digitizing prices vary based on size, detail, and turnaround time. In general:
-
Small logos: $10–$20
-
Medium designs: $25–$40
-
Large jacket backs or complex artwork: $50–$75
-
Rush orders: 25–50% extra depending on urgency
Professional digitizers may also offer discounts for bulk or repeat orders.
How Long Does It Take to Digitize a Design?
The time required depends on design complexity and revisions. Typical turnaround times include:
-
Simple designs: 30 minutes to 2 hours
-
Detailed artwork: 3–6 hours
-
Standard service: 24–48 hours
-
Rush orders: 4–8 hours
The digitizer’s experience and software efficiency also affect delivery speed.
What Affects the Quality of a Digitized File?
Several factors influence how a design will stitch out:
-
Artwork Quality: High-resolution artwork ensures accuracy.
-
Fabric Type: Stretchy or textured fabrics require density adjustments.
-
Stitch Direction: Proper direction enhances shine and smoothness.
-
Underlay Type: Provides stability and prevents shifting.
-
Digitizer Skill: Experience determines how efficiently stitches are placed.
-
Machine Calibration: Proper tension and hooping guarantee the best results.
What Are Common Problems in Digitizing?
| Problem | Cause | Solution |
|---|---|---|
| Fabric puckering | Too dense stitches | Reduce density or add stabilizer |
| Thread breaks | Poor pathing or tension | Optimize sequence and thread type |
| Jagged edges | Wrong stitch angle | Adjust direction and underlay |
| Text unreadable | Letters too small | Enlarge text or use satin stitch |
| Colors misaligned | File or machine setup error | Check thread order and re-test |
Most of these problems can be fixed easily once identified early during testing.
Can I Learn Digitizing Myself?
Yes, many embroidery professionals learn to digitize on their own using specialized software such as Wilcom, Hatch, Pulse, or Embird. However, mastering digitizing requires time, practice, and understanding of fabrics, stitch techniques, and machine operation.
Beginners should start with simple logos and gradually move to complex artwork. For businesses handling large orders or demanding clients, working with a professional digitizer saves time and ensures top-quality output.
How Can I Ensure the Best Results?
Here are key tips for success:
-
Always start with clean, high-resolution artwork.
-
Choose the right stabilizer for the fabric.
-
Avoid overly thin text or small details.
-
Test each new design before bulk production.
-
Keep notes on stitch counts, colors, and machine settings for future use.
These simple steps can dramatically improve your embroidery quality and efficiency.
What Tools and Software Are Commonly Used?
Professional digitizers use advanced software tools that provide full control over stitch behavior, direction, and density. Popular programs include:
-
Wilcom Embroidery Studio
-
Hatch Embroidery Software
-
Pulse Signature
-
Brother PE-Design
-
Embird Studio
Each program offers different levels of automation and customization, allowing digitizers to adapt to various machines and materials.
Industry Insight
As embroidery technology advances, new tools like AI-assisted digitizing and 3D puff embroidery are becoming more common. These innovations save time while improving precision. However, even with automation, expert judgment remains irreplaceable — because only human experience can truly predict how thread, needle, and fabric will interact.
In the world of apparel decoration, Common Questions About Digitizing for Embroidery often revolve around how to achieve perfect results every time. The answer always comes down to the same principle: a well-digitized file is the foundation of professional embroidery. It ensures cleaner stitching, faster production, and long-lasting results.
Conclusion
Digitizing is the bridge between creativity and craftsmanship. It transforms your vision into a perfectly executed design that represents quality and professionalism. Whether you manage a commercial embroidery business or create custom pieces at home, understanding the basics of digitizing helps you make better decisions and deliver superior results.
When done right, digitizing saves time, enhances efficiency, and makes every stitch a reflection of skill and precision.