Building a website is more than just putting visuals and text together—it’s a structured, creative process that transforms an idea into a fully functional, user-friendly digital experience.
Whether you’re designing a portfolio, eCommerce site, or startup landing page, every professional web designer follows a systematic process that moves from strategy and wireframing to design, testing, and launch.
In this guide, we’ll break down the complete web design process—from wireframe to launch—so you can understand how great websites are built and how to follow the same approach in your projects.
1. Understanding the Client’s Goals and Requirements
Every great design begins with clarity.
Before opening Figma or Sketch, designers spend time understanding the client’s vision, target audience, and business goals.
Key steps in this phase include:
- Conducting client interviews or kickoff meetings.
- Researching the target audience and competitors.
- Identifying goals such as lead generation, eCommerce sales, or brand awareness.
Pro Tip: Ask “Why?” multiple times until you understand the purpose behind every design request. This helps you build solutions that actually work.
2. Research & Inspiration Gathering
Once the goals are clear, the designer conducts research to inform design decisions.
This includes analyzing competitors, collecting design inspiration, and reviewing user expectations in that industry.
Common research tasks:
- Competitor analysis: What works (and what doesn’t) in similar sites.
- User research: Understanding what the audience values most.
- Mood boards: Gathering colors, typography, and layout inspiration.
Pro Tip: Use tools like Pinterest, Behance, and Dribbble to collect visual inspiration before designing.
3. Creating the Information Architecture
Before any visuals come into play, designers organize how the site’s content and pages will be structured.
This stage involves creating sitemaps and user flow diagrams that outline navigation and hierarchy.
Key outputs:
- Sitemap: Shows all main and subpages.
- User flow: Illustrates how users move through the site.
Pro Tip: Keep your navigation simple—users should find anything they need in three clicks or less.
4. Designing Wireframes
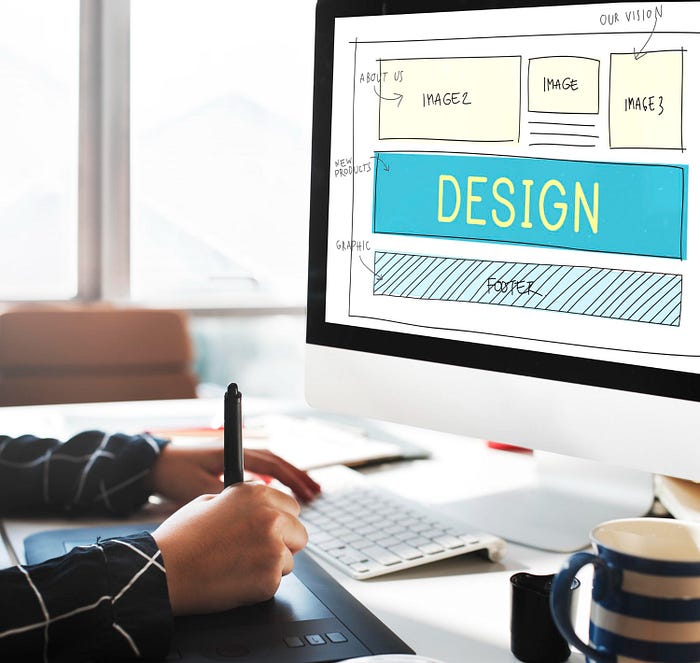
Now it’s time to visualize the structure through wireframes—the blueprint of your website.
Wireframes show the placement of key elements (headers, images, buttons, forms) without focusing on color or style.
Why wireframing matters:
- Saves time by clarifying layout early.
- Ensures usability before visual design.
- Provides a foundation for feedback and iteration.
Popular tools: Figma, Balsamiq, Sketch, or Adobe XD.
Pro Tip: Start with low-fidelity wireframes (simple boxes and text) before moving to high-fidelity versions.
5. Visual Design – Bringing the Wireframe to Life
Once the structure is approved, the fun begins: creating the final visual design.
This includes choosing the color palette, typography, imagery, and interactive elements that define the website’s brand identity.
What this stage involves:
- Applying brand colors and fonts.
- Designing UI components (buttons, forms, cards).
- Ensuring visual hierarchy and consistency.
- Creating responsive layouts for desktop, tablet, and mobile.
Pro Tip: Use a design system or style guide to maintain consistency across all pages.
6. Prototyping and User Testing
Before development begins, designers build interactive prototypes to simulate real user interactions and gather feedback.
Tools like Figma or InVision allow you to create clickable versions of your design to test flows and functionality.
User testing helps identify:
- Confusing navigation patterns.
- Unclear call-to-actions (CTAs).
- Visual or accessibility issues.
Pro Tip: Run quick usability tests with at least 5 users—small insights lead to huge improvements.
7. Development – Turning Design into Code
Once the design is finalized, it’s handed off to developers (or developed by designer-developers).
This is where the visual design is translated into functional code.
Technologies used:
- Frontend: HTML, CSS, JavaScript, React, or Webflow.
- Backend: Node.js, PHP, or other frameworks.
- CMS Integration: WordPress, Webflow, or custom CMS.
Pro Tip: Collaborate closely with developers—provide assets, design specs, and spacing details directly from Figma.
8. Testing and Quality Assurance
Before going live, thorough testing ensures the site looks and functions perfectly on all devices and browsers.
What to test:
- Responsive design: Looks great on desktop, tablet, and mobile.
- Speed optimization: Fast-loading pages retain more users.
- Cross-browser compatibility: Works smoothly on Chrome, Safari, Edge, and Firefox.
- Accessibility: Follows WCAG standards for inclusivity.
Pro Tip: Use tools like Google Lighthouse and BrowserStack to test your site’s performance and compatibility.
9. Launch and Handoff
Once everything is tested and approved—it’s launch time!
The designer ensures a smooth handoff to the client or development team, including all assets, design files, and documentation.
Post-launch tasks include:
- Setting up analytics (Google Analytics, Hotjar).
- SEO optimization for better visibility.
- Training the client on CMS usage if needed.
Pro Tip: Always keep a checklist for launch-day tasks—missing a favicon or broken link can hurt first impressions.
10. Post-Launch Maintenance and Iteration
The launch isn’t the end—it’s the beginning of real user data.
Designers monitor site performance and user behavior to find opportunities for improvement.
This includes:
- Tracking metrics (bounce rate, conversions, scroll depth).
- A/B testing design changes.
- Updating content and improving SEO.
Pro Tip: Treat your website as a living product. Regular updates and UX improvements keep it competitive and relevant.
Conclusion
The journey from wireframe to launch is a thoughtful and creative process that blends strategy, design, and technology. Each step—research, wireframing, prototyping, testing, and iteration—ensures the final website isn’t just visually stunning but also intuitive, responsive, and user-centered.
At Devoq Design, a leading UI/UX Design Agency in Nizamabad and UI/UX Design Agency in Khammam, we follow a meticulous, research-driven approach to craft digital experiences that delight users and achieve business goals. Whether you’re launching a new brand or redesigning an existing site, our process ensures your vision comes to life with clarity, consistency, and creativity.


